Monday, November 14, 2011

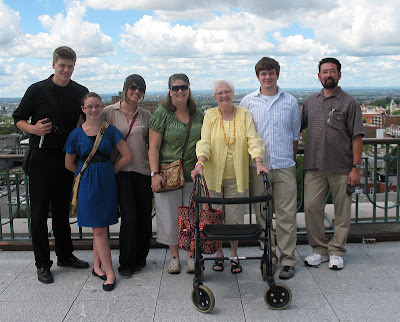
Home is wherever my family is...

I guess this year with kid #3 off to college, 

and just 1 more chiilun at home to be raised,
has got me feeling all sentimental about my family.

I have spent the last 27 years of my life dedicated to them. 
And as one by one they move off to begin their own lives I feel happy and satisfied that my hubby and I have done a good job with them.
Every one of them is a well rounded interesting person with a good set of values and a love for God.

Each one of them is a light to the world as they move out their to live their faith. It is wonderful to see. 
And no matter where we are, 
when we are together we are "Home"
I'm sure you feel the same about your family!
xx
~Annie

Tuesday, November 1, 2011

I'm still here!

I haven't posted in a while because our lives here went topsy-turvy for a couple of weeks! 
My husband lost his mother rather quickly and unexpectedly. 
We had a couple of weeks of hospitals and relatives and a funeral. 
We had the boys back and forth from college twice in a week and in the middle of all of that,
my brother, who is our very close to our family and our parish priest, 
was yanked out of our parish and transferred to another town. 
I was not ready for all of this, but I don't think this is something you can be ready for.
Life goes on.
So my great plans for releasing 3 new patterns have gone astray. I am chasing them down as we speak! LOL!
In the middle of all of this it was applesauce making time. This was actually a blessing, something to concentrate on while waiting for the funeral to happen.
My sister in law and I put up a few quarts.
I made some more yesterday, and some applebutter,
which turned out delicious!
I hope to be back at the end of the week with some new patterns. It is great to get back to work, which lucky for me is really play!
xx
~Annie 

Wednesday, October 19, 2011

Color tinting

I am doing a sort of study on color tinting. You know, its when you add color to your stitchery with either crayons or colored pencil. This is a design by
Meg Hawkey of Crabapple Hill. 
It was lots of fun to do!

Then I decided to try it on a design of my own.  I began with crayons, coloring in the whole background with white and then adding the color.
Then I added the stitching and some colored pencil detail. I couldn't stop there and ended up using watercolor pencils.

When I am finished the whole thing will be heat set with and iron, pressing from the back onto a piece of scrap muslin (in case some of the color comes off)
What do you think?

Thursday, October 13, 2011

My friend Jenny is having an awesome giveaway!

Jenny has a great blog in Australia,
and she publishes a monthly little digital magazine called Elefantz Home 
which is all about beautiful stitchery and also lots of tips and inspiration.
I "heart" Elefantz Home,
AND
I have been invited to be a guest designer in a future issue!
Yay!
ANYHOO!
Jenny is having a really great giveaway to celebrate 
1500 followers
 (Wow! check that out!)
Among the PRIZES is a $50.00 gift certificate for 
FAT QUARTER SHOP!!!
So hop on over to Jenny's blog and check it out!


Quilty Neighborhood #5 and peek at house #6!

At long last the 5th installment of the Quilty Neighborhood series is here!
Only 2 more houses to go, and House #6 is almost ready as well!
Here is a sneak peek at the whole thing so far, WITH a little peek at house #6!
Its coming along, don't you think?

Available at your favorite Needlework shop or at my website here!

Friday, September 30, 2011

On TDIPT tonight!

 Ophelia the harvest gatherer!


And Happy Jack!
A tabletop pumpkin!

AND, during the month of OCTOBER, my pattern 
DOROTHY and TOTO is 
ON SALE 
at my website and my Etsy Shoppe!


How to paint a pumpkin head!

 When autumn comes I always feel like making a pumpkin head doll! I love to work with my favorite colors of paint, deep green and olive green, yellow ochre, burnt orange, some pretty reds!
Oh its so much fun!
So I thought I would show you how I do the underpainting on one of these dolls, to get the wonderful depth of color and tone that every vegetable girl should have!
LOL!
The idea is to under-paint highlights and low lights. The cheeks and forehead I have painted with yellow, then I have come in with deep green where the shadows might be.
Here is the face and shoulders:
The side and back of the head:
Coverage is not important. 
You will worry about coverage when you do the top coat.
Right now you are just getting in the highlights and low lights.
The same goes for the arms and legs:
Next,  you will  go over everything with a top coat. I used Terra Cotta. I am just using the 2 oz. cheap paints from the craft store.
First you block in the color, the eye whites, the color of the irises and pupils. When this is dry, sand it all over with 220 grit sand paper. This is what brings out your underpainting, and give the doll that aged patina-almost like leather!
All of the details are done with colored pencil:
Here is another one-just the head!